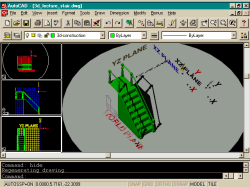
Building Complicated Models using the User Coordinate System Icon (Part 2 of 3)
<= Part 1
3D Modeling in AutoCAD R14
Building Complicated Models using the User Coordinate System Icon (Part 2 of 3)
Comments by: Odin Cary
Contents:
Using
the UCS to draw Stairs ---- Using the UCS
to draw handrails ---- Using the UCS to
draw stair columns ---- Taking
the extra steps to wrap up the project
6Using the UCS to draw Stairs
To follow the exercise as per this page, you may
download the following drawing file from the ARCHIdigm site: Hol-deck.dwg.
Once you have downloaded this drawing file, move it to a project folder of your creation and open the file with AutoCAD.
1STEP:
In order to create stairs, we need to reposition the User Coordinate System (UCS) icon
in such a way that we can draw perpendicular to the normal working (paper) surface.
First, we will provide a new origin for the UCS icon so that we can see exactly where we are with respect to this icon.
From the Tools pull-down menu select UCS and
on the UCS fly-out menu, select Origin. You may now snap to any intersection on the
red (world-plane) gird or, on the 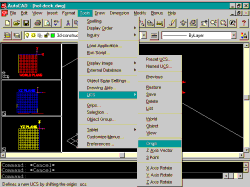 command line, type "4,0,0" – this is the
coordinate I will use for this demonstration.
We have now not only repositioned the origin of the UCS but also the origin of our drawing. To see the UCS icon at this new origin, we need to set the UCS icon display to Origin.
Select View from the pull-down menu and then go to Display and on to UCS where you can select Origin. You can also type the following on the command line:
Command: ucsicon
ON/OFF/All/Noorigin/ORigin <ON>: or
You should now observe that in the currently active viewport, the UCS icon has changed position.
To get the UCS icon to reposition to the new origin in all
of the viewports, you will need to type the following on the command line: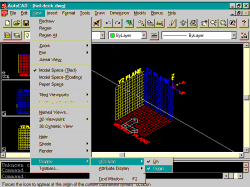
Command: ucsicon
ON/OFF/All/Noorigin/ORigin <ON>: all
ON/OFF/Noorigin/ORigin <ON>: or
2STEP:
Now we will rotate the UCS icon so that it is parallel with the blue plane (or 90
degrees off the xy-plane through the X-axis).
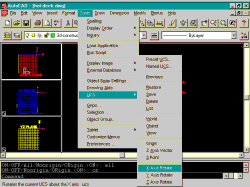
On the Tools pull-down menu go to UCS and on the UCS fly-out, select X Axis Rotate. On the command line, type "90".
You can also type the following on the command line:
Command: ucs
Origin/ZAxis/3point/OBject/View/X/Y/Z/Prev/Restore/Save/Del/?/<World>: x
Rotation angle about X axis <0>: 90
You should now observe that in two of your viewports, the
UCS icon is standing on the X-axis edge. As far as AutoCAD is concerned, this is now the
orientation of the 2D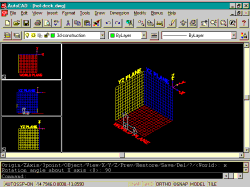 world.
We can now begin to draw the edge or sectional view of our stairs.
3STEP:
Use the Pline command and begin drawing your stairs by specifying "0,0"
as the origin of your Pline.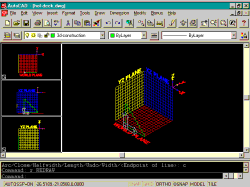
Aim your Pline up along the Y-axis, make sure your Osnap is off and type "8" on the command line.
Now aim the Pline along the positive X-axis and type "1".
Aim the Pline down the Y-axis and type "1".
Repeat this process until you have reached the ground plane again and then Close the Pline.
4STEP:
Now all we have to do is extrude the 2D Polyline stairs so that we have 3D stairs.
There are basically two methods for deriving a 3D surface model in this scenario.
The second method will allow for more flexibility because each tread is recognized as an individual surface plane and thus you can stretch them uniquely. Here’s how:
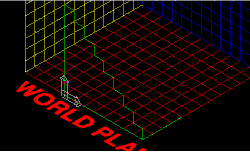 Draw a regular line at the front (base) of your stairs on the red grid
back toward the blue grid. Make the line "4" units (or grids) long.
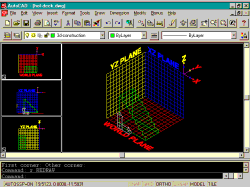
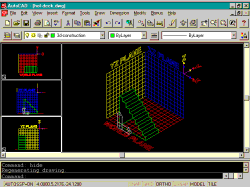
From the Draw pull-down menu, go to Surfaces and select the Tabulated Surfaces command.
For Path Curve, select the stairs.
For Direction Vector, select the last line we created on the red grid.
7Using the UCS to draw handrails
5STEP:
Creating a handrail will require a bit more effort with respect to the working
knowledge of UCS manipulation. The primary problem is that a square or tube handrail is
rarely perpendicular to the ground plane; instead it follows the path of the slope
generated by the rise and run of the stairs. This means that we will need to be careful
when 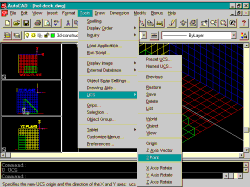 positioning
the UCS.
First draw a line from the top of the stairs to the bottom using endpoint object snap.
Now we need to reposition the UCS icon at the base of this line and align it with the slope of the stairs. This can be done quite easily by using the "3-point" method.
From the Tools pull-down menu, go to UCS and on the UCS fly-out, select 3 Point.
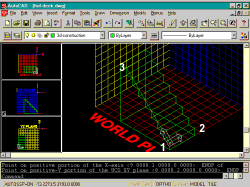
For the first point, that of the origin, endpoint 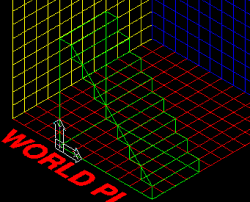 objects snap to the
base of the line (base of the stairs).
For the second point, the X direction, endpoint object snap to the opposite side of the stairs in the direction of the blue gird.
For the third point, the Y direction, endpoint object snap to the top of the line (top of the stairs).
This provides us with an alignment parallel to the slope of the stairs. But, our handrail needs to be drawn perpendicular to this slope. This means that we need to rotate the UCS about the x-axis by 90 degrees in the clockwise direction; i.e., -90 degrees on the x-axis.
On the Tools pull-down menu, go to UCS and on the UCS fly-out select X Axis Rotate.
Type "-90" on the command line.
Since our isometric view conflicts with the UCS icon display, we can’t see the new UCS icon orientation in the main viewport, but you should be able to see it in two of the smaller viewports.
6STEP:
Draw a circle by specifying its origin at "0,0" and its radius
as ".1".
You could also change the viewing angle, as discussed earlier, to see the stairs from an angle that will also allow you to see the UCS icon. This would make it easier to simply draw the circle without relying on typed commands.
Now that we have a circle at the base of our line, we can utilize the same exact command sequence that we used to project the stairs along a path vector.
From the Draw pull-down menu, go to Surfaces and select the Tabulated Surfaces command.
For Path Curve, select the circle we just created.
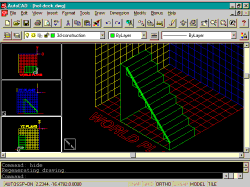 For Direction Vector, select the last line we created along the slope
of the stairs.
| Discussion: If you find that a hexagonal handrail is not to your liking, you can control the number of surface tabulations AutoCAD creates when creating a 3D surface. You must set this value prior to using any 3D surface command. To set surface tabulation, type: "Surftab1" – set this variable to the number of edges you want on your circular handrail (try 15). |
7STEP:
Now we just need to restore our UCS icon back to a previous setting so that we can
move the handrail up and then copy it over for the other side.
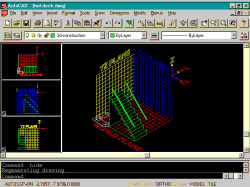 From the Tools pull-down menu, go to UCS and on the UCS fly-out
select Previous.
Repeat this again and you should see your UCS icon sitting at the back of your stairs in the original position when we started the stair elevation.
Now you can use the move command to move the handrail up "3" units.
From the Tools pull-down menu, go to UCS and on the UCS fly-out menu, select World. This will put the UCS icon back to the default orientation allowing you to copy the handrail as you would in a 2D drawing.
8Using the UCS to
draw stair columns
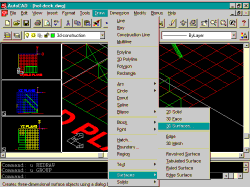
Now we will combine all of our skills and create a column at the base of the stairs. We’ll put a cube at the top and bottom of the railing and a milled center piece between them.
8STEP:
From the Draw pull-down menu, go to Surfaces and on the Surfaces fly-out
menu, select 3D Surfaces…
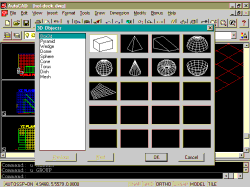
On the 3D Surfaces Dialogue box select Box3D and endpoint object snap to the base of the stair corner.
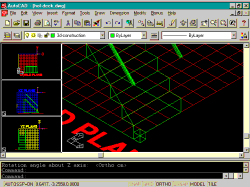
Draw the cube (Box3D) as ".5" units square.
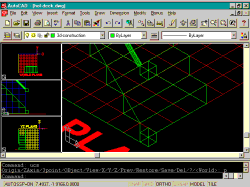 Rotate the UCS on the X axis by 90
degrees and copy the cube up along the Y axis "3.5" units.
Command: ucs
Origin/ZAxis/3point/OBject/View/X/Y/Z/Prev/Restore/Save/Del/?/<World>: x
Rotation angle about X axis <0>: 90
9STEP:
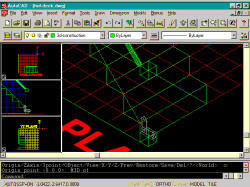 Provide a new UCS origin by midpoint object snapping to
the midpoint of the top surface of the first cube.
Now that we have the UCS icon at the correct position to begin creating the milled center piece of our column, we need to draw a silhouette of the round piece and then revolve it about a centerline.
From the View pull-down menu, go to 3D Viewpoint and on the 3D Viewpoint fly-out go to Plan View. On the Plan View fly-out, go to Current UCS.
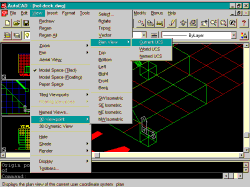
This action will change your current viewport so that you are looking directly at the UCS icon perpendicular to the XY-plane. This is essentially like our normal World View alignment when doing normal 2D drafting.
Now zoom in on the column and draw the silhouette of the center piece using Pline.
9STEP: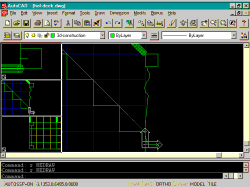
The next step is a little tricky because you need to draw a line that will represent the center of the two cubes.
*The following sequence is a more advanced technique using the Geometric Calculator to calculate the midpoint between two object points in space. If you have trouble following this technique, just use any method you can to place a line at the center of the cubes.
Command: LINE
LINE From point: 'cal
Initializing...>> Expression: mee
>> Select one endpoint for MEE:
>> Select another endpoint for MEE:
To point: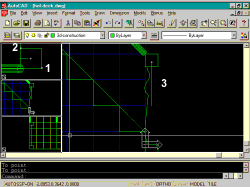
To point:
Now we will set the Surface Tabulations for the Horizontal and Vertical segments.
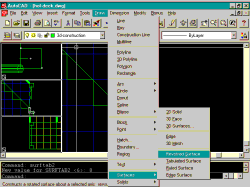
Command: surftab1
New value for SURFTAB1 <15>: 15
Command: surftab2
New value for SURFTAB2 <6>: 8
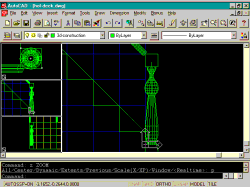 The final product should look like this.
Notice that the centerline is still there and the original silhouette is also still present. You can erase both at this time.
10STEP:
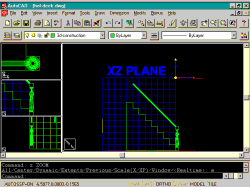 Now you can move
the handrail in ".25" units to center up with the column.
Copy the column to the other side.
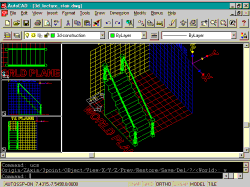
You can also copy the column to the top of the stairs as illustrated here.
 9Taking
the extra steps to wrap up the project
11STEP:
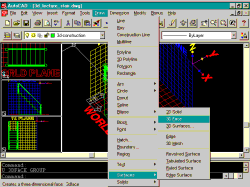
From the Draw pull-down menu go to Surfaces and on the Surfaces fly-out,
select 3D Face.
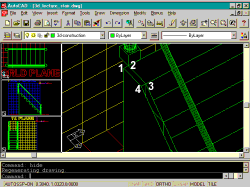
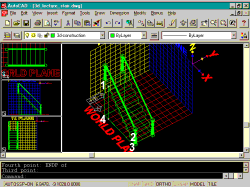 Draw a 4 point 3D Face by endpoint object snapping to the four corners
illustrated to the right.
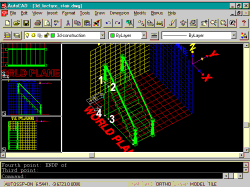
Repeat the previous command sequence and draw another 4 point 3D Face by endpoint object snapping to the four corners illustrated to the right.
12STEP:
From the Draw pull-down menu go to Surfaces and on the Surfaces fly-out,
select Edge. 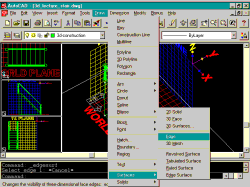
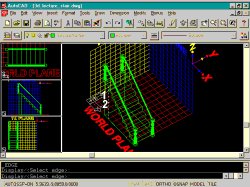
To remove the common edge between these two faces, select the line illustrated to the right.
Since we created two faces, you will need to repeat this command sequence to remove the second edge as well.
 13STEP:
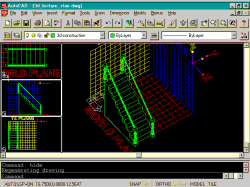
Check the results of your labor by using the Hide command.
Unfortunately, when faces share a common point in space, both are usually visible when Hiding or Shading.
To eliminate this phenomena, you can simply move the last two edges out a tiny fraction of an inch or continue to construct the actual surfaces that would make up the stair edge.
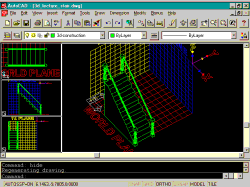
Here’s what it looks like when the edges are moved out .01 inches.
 14STEP:
To actually build the wall or stringer on the edge of the stairs, you begin by copying
the previous two surfaces out ".25" units
Now zoom in to the top tread and begin constructing a 3D Face by endpoint object snapping as illustrated to the right.
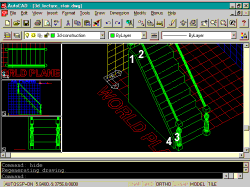
Repeat this process for all of the edges you want to appear solid.
Here’s what the final product should look like.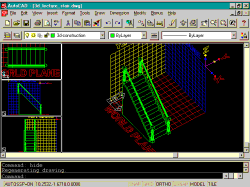
15STEP:
You can quickly expand on this by copying columns, adding railing and more surfaces.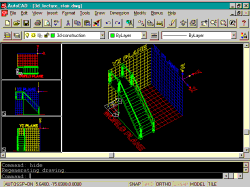
And here is what the same model looks like Rendered with a
Distant Light, Ray Traced Shadows and no materials.
Part 3 =>