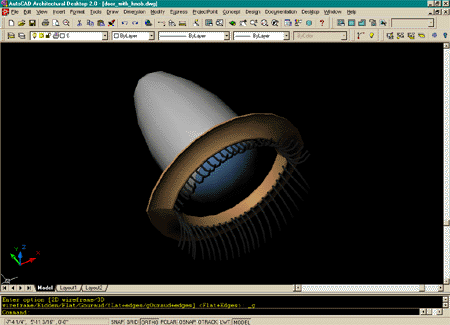
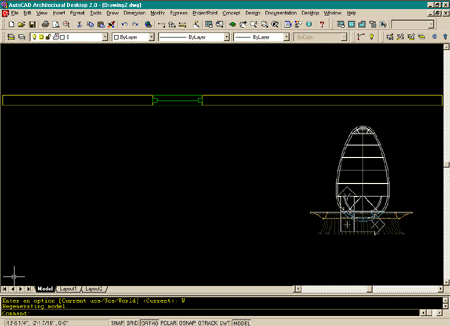
| Custom Window Objects Well, there's the proof, it can be done; ADT 2.0 does provide the ability to make completely custom window designs if you are willing to go through the trouble of modeling the whole thing. Build the 3D Window and make a block out of it To start, you will need to build a 3D Window and turn it into a block. Choose a logical insertion point that will assist you in relating your new Window to a Wall. For this example, I built a rather abstract window just to see how far this technique can be pushed. The eyeball window object, right, is made entirely of solids and the insertion point for the block, is the center of the back of the "eye-lid" (the brown part). This is obviously not the best solution for general window building since solids consume quite a bit of memory. |
|
||
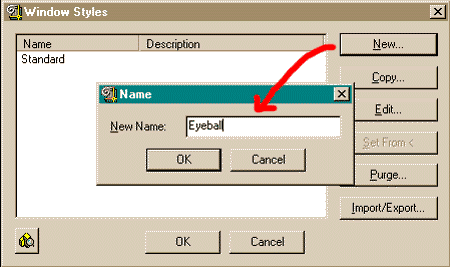
| Creating a Window Style
Use the WINDOWSTYLE command to create your window. On the Window Styles dialogue box, pick the New... button and type in a name for your new window object. |
 |
||
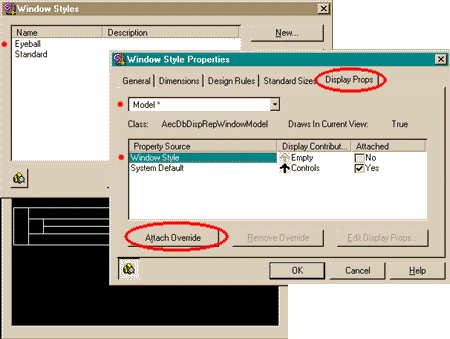
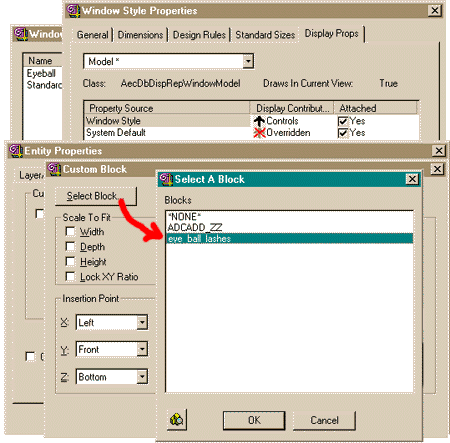
| Editing your custom Window Style On the Window Styles dialogue box, pick the Edit... button. On the Window Style Properties dialogue box, pick the Display Props tab and select Model from the pull-down list. Since you probably don't want all of your windows to look the same, select Window Style in the Property Source list and Attach Override.
|
 |
||
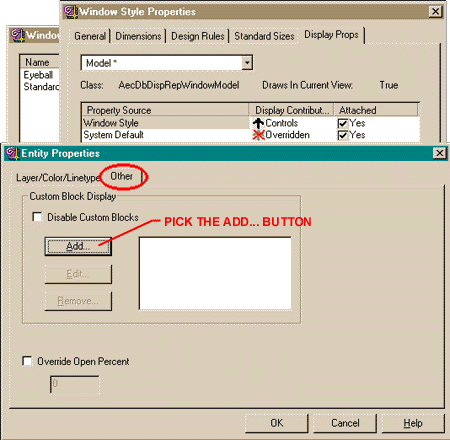
| Attaching an Entity Properties
Override. On the Entity Properties dialogue box, pick the Other tab. Next, pick the Add... button.
|
 |
||
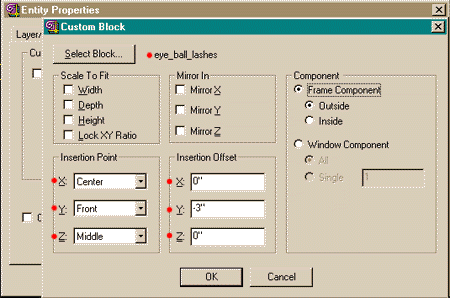
| Selecting a Block to attach to our
Window On the Custom Block dialogue box, pick the Select Block... button and look for the 3D Window block you created earlier.
|
 |
||
| Adjusting the Window block to sit in
the Wall Once you have selected your Window block, you can adjust its location and position in numerous amazing and confusing ways. I may not have the best setup here but this is what I got to work after numerous trial and error attempts. Where you chose the Window block base insertion point will certainly affect these numbers. I highlighted, with red dots, all of the critical areas that I found necessary to "tweak" in order to get my Window block to work correctly. I made no changes to the Scale to Fit region because I did not want my Window block to respond to the Window sizes when I place a new Window object in a Wall. If you want a more typical type of window that adjusts as ADT's native window objects, check the appropriate Scale To Fit check boxes. A good way to figure out what you may want to adjust here, is to compare your settings with those for the Custom Window Styles that came with ADT 2.0; like the Bay Window. |
 |
||
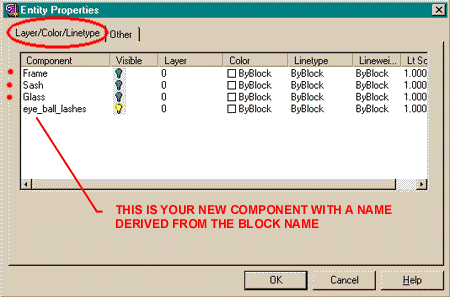
| Turn off native Window Style
components On the Entity Properties dialogue box, pick the Layer/Color/Linetype tab. Next, turn off all native Window Style components that you don't want to see as part of your custom window. My unique window block, for example, is completely self-contained and thus will not use the native Frame, Sash or Glass. |
 |
||
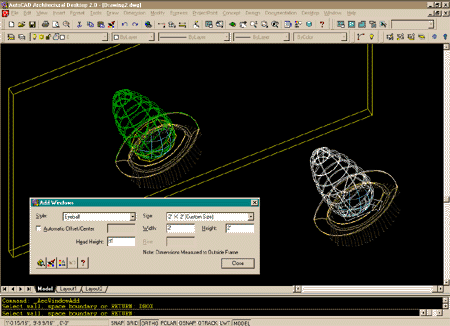
| Make sure your new Custom Window
Object works Test your new Window Object by using the Add Window command and place it in a standard Wall object. In my example, right, the size will now correspond to how tightly I want the wall to wrap around my custom "eyeball" window object. With a more traditional custom window object, the size should correspond to the actual window proportions. |
 |
||
| Oh no, What about Plan View? If you use a really unique design for your window and did not use any native ADT objects to build it, you should find that your window object will not appear correctly in non-3D views.
|
 |
||
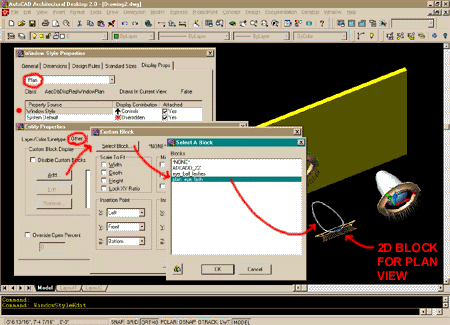
| Attaching Overrides and using unique
Blocks for other Views. If you find that you need to make a unique block for your other common views, you basically have to repeat the whole process discussed above. 1) you need to create a 2D block for what your custom window will look like in a specific view; like plan, for example - shown, right. 2) you need to edit your custom Window Style by working on the Display Props tab. Set the appropriate view, like Plan, select Window Style and Attach Override. 3) on the Entity Properties dialogue box, Add... your 2D block and make necessary X, Y, Z and other settings. |
 |
||
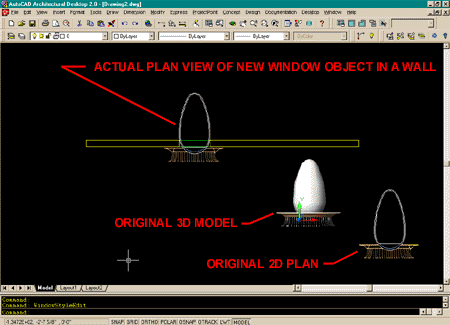
| Checking the Final Product in Plan
view Here's what all of the hard work should look like. In plan view, you should see your 2D version of your custom Window object and in 3D views, you should see the full 3D modeled version. One of the problems with such a uniquely custom Window object, is that now I have to create 2D blocks of how I want all of the other views that I might choose to use on a project; like section, elevation and reflected ceiling plan views. |
 |
||
| The technique discussed above can also be used to attach simple objects, like handles, to native ADT Window objects. This would be similar to adding a knob to a door handle and you can read about how to do that here -> Door Knobs. |