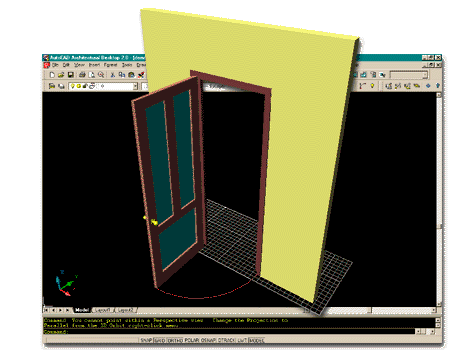
| Door knobs Well, there's the proof, it can be done; ADT 2.0 does provide for hardware if you are willing to go through the torturous labor. Actually, it is not that bad once you get the steps down and save the Door Style changes for future use. Below, I go through the basic steps I used to make a common interior door knob attach itself to a door style.
|
 |
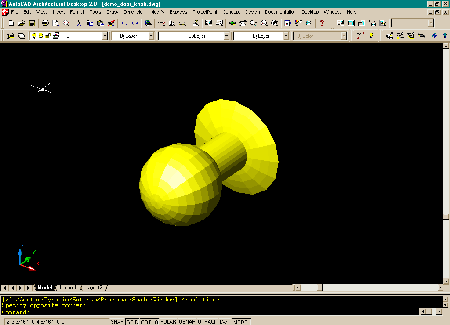
| Build the 3D Knob To start, you will need to build a 3D door knob. For this example, I will provide the one shown, right. You can download it by picking on this hyperlink - > knob. Making your own Knob:
|
 |
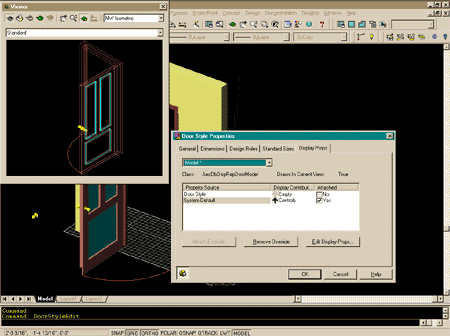
| Modifying a Door Style You can modify a Door Style either before using it or after, as shown, right. Use the DOORSTYLE command to edit your door. Once you select the door style to edit, the Door Style Properties dialogue box should appear as shown. |
 |
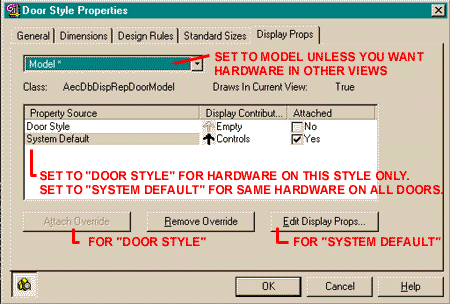
| One door style or all door styles? On the Door Style Properties dialogue box you can go straight to the Display Props tab. If you want the Knob in 3D model view only, set the appropriate view on the pull-down menu, as shown. You could repeat the process, as described below for other views if you desire door knobs in elevation, for example. The other matter to consider is whether or not you want all of your Door Style to have this knob or just the current Door Style. If you just want some sort of generic knob so that the doors look a little more realistic, use System Default; this will put the knob on all doors. OR If you are putting unique knobs on individual Door Styles, you will have to select Door Style and then pick on Attach Override to make the following changes. |
 |
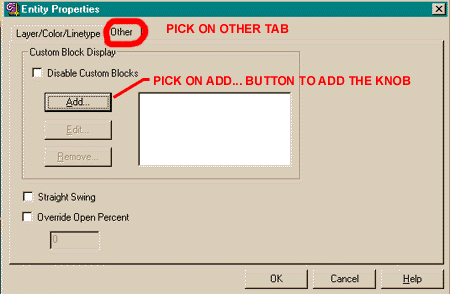
| Add the Knob block On the Entity Properties dialogue box, select the Other tab. Now you can basically add anything to a door you want. Pick the Add... button. |
 |
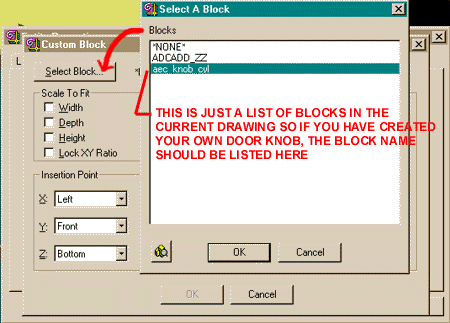
| Finding the block in your drawing On the Custom Block dialogue box, pick the Select Block... button and look for the 3D door knob. If you created your own, make sure you made a block of it. If you downloaded mine, from above, make sure you inserted it into your current drawing; then look for "aec_knob_cyl". |
 |
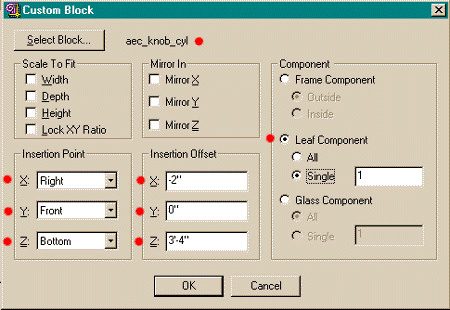
| Adjusting the Knob block to sit on
the door Once you have selected you Knob block, you can adjust its location and position in numerous amazing and confusing ways. I may not have the best setup here but this is what I got to work after numerous trial and error attempts. Where you chose the knob's base insertion point will certain affect these numbers. Notice that the Insertion Offset X value is -2, the exact width of ADT's default doors. I highlighted, with red dots, all of the critical areas that I found necessary to "tweak" in order to get my Knob to work correctly. Keep in mind that if you made your own Knob, some of these numbers and settings may be different. |
 |
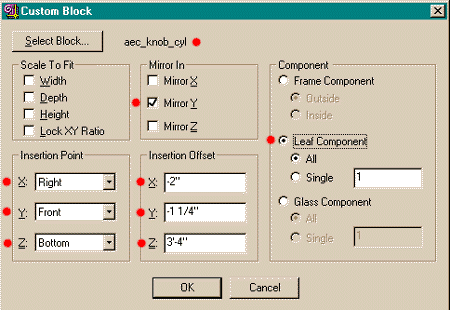
| Repeat the ADD.. for the Knob on the
other side of the door Here we repeat the process, from above, for the the Knob on the other side of the door. So, use the ADD... button and add the same block one more time. Notice that the Knob needs to be Mirrored on the Y-plane. You may be able to adjust the X and Y insertion Offset values better than what I show, but it works as shown. |
 |
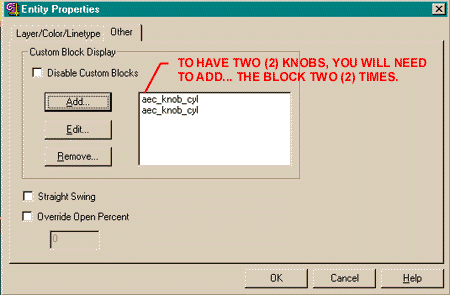
| Make sure you have Knobs on both
sides of your door Here I just show that you should have two copies of the same Knob block if you want a knob on both sides of the door. |
 |
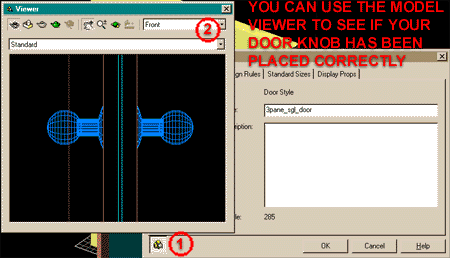
| Use the model Viewer to check Knob
alignment I used the Front view option (shown as (2) ) to make sure that both knobs actually are sitting on the door. |
 |
| The Finished Product To get the knob to look golden in a shaded view or rendered view, you have to make some other Display Prop changes. I first created a new layer for my Door Knob and assigned the layer a color. Then, back on the Door Style Properties, on the Display Props tab, I edited the Display Props by assigning the new objects ("aec_knob_cyl") to my newly created layer. I also assigned color By Layer so that I can easily change the color anytime I want. This will also make it easy to turn the knobs on and off for different views. |
 |