Basic Landscaping (Part 2 of 3).
<= Part 1
Rendering in AutoCAD® 2000 PART 2 (similar to R14 and
Architectural DesktopTM)
Basic Landscaping (Part 2 of 3).
In this set of exercises, we use basic AutoCAD default Landscape objects to add more "realistic" plants to the island. In chapter 2, we use a custom set of images to create a custom Landscape object that we will add to the default Landscape library. This technique will demonstrate how you can create an unlimited variety of Landscape objects for your own library.
| 6Landscaping your Model | |
| To follow the exercise as per this page, you should
continue with the model from the previous exercise or you may download the following
drawing file from the ARCHIdigm site: MESH_IS.EXE. Once you have downloaded this self-extracting file, move it to a project folder of your creation and double click on it to extract the Mesh_island.dwg file, then open the file with AutoCAD. The drawing should look like the image to the right. In Step 1, below, we assume that you have gone through the first exercise in this series and are now ready to create the landscape materials. This means that you have already created the water, sky, mountain terrain, boat material, the beach sand and a SUN. |
 |
| 1STEP: From the View pull-down menu, select Named Views... and then select the Orthographic and Isometric Views Tab. Highlight Southwest Isometric, pick the Set Current button and pick the OK button. This dialogue box can also be activated by typing "V" or "DDVIEW" on the command line. This will provide us with a basic point of reference from which we can observe the changes that we will be making to our 3D environment. |
 |
| 2STEP: From the View pull-down menu, select 3D Views and then on the cascading menu, select SW Isometric. This will provide us with a basic point of reference from which we can observe the changes that we will be making to our 3D environment. In the illustration to the right, you should also notice that I have the Render Palette up on the screen. You can get this palette or Toolbar up by right-clicking over any tool button and then pick the Render checkbox. |
 |
| 3STEP: Zoom in on the area near the row boat, as illustrated to the right. From the View pull-down menu, select Render and then cascade over to select Landscape New...
|
 |
| 4STEP: On the Landscape New dialogue box, highlight "Eastern Palm" in the Library list. Set the Geometry radio button to Single Face. Check the View Aligned check box. Set the Height to 100.0
Pick the Position < button Use the Nearest Object Snap to place the base of the Palm on the beach (see image below, right). |
 |
| 5STEP: Once you have placed the Palm on the beach, you may notice that it appears a bit small when compared to the row boat. Since we were limited by the 100 inch size in Step 4, we will now use the SCALE command to double ( 2 ) the size of our Palm. You can use the INSERTion Object Snap to get the true base point of the Palm.
|
 |
| 6STEP: Place another Eastern Palm near the first one and try using the Crossing Faces option under Geometry in the Landscape New dialogue box.
|
 |
| 7STEP: Now test your work. Render as per instructions in the first exercise, Step 10.
|
 |
| 8STEP: Create and place numerous trees and other vegetation all over the island as per previous directions. You can copy an existing Landscape object and simply copy it like any other AutoCAD object. From the View pull-down menu, select Named Views... and then select the Named Views Tab. Highlight SW-CORNER, pick the Set Current button and pick the OK button. Render this view as per Step 7. |
 |
| 7Creating Custom Landscape Objects | |
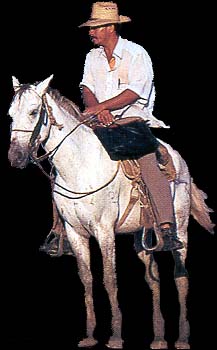
| 9STEP: Right-click on the image to the right and use the Save Picture As option to save this image as a .jpg file into your current working directory (probably the one with this island exercise in it). Keep the file name as: man_horse_outline.jpg |
 |
| 10STEP: Right-click on the image to the right and use the Save Picture As option to save this image as a .jpg file into your current working directory (probably the one with this island exercise in it). Keep the file name as: man_horse.jpg
|
 |
| 11STEP: Now that you have two custom images to use as Landscape images in AutoCAD, we can create a library component that merges both images together when we Render. To create your own Landscape object, select the Landscape Library button, shown enlarged, right. You can also get this command from the View pull-down menu to Render and over to Landscape Library...
|
 |
| 12STEP: On the Landscape Library dialogue box pick the New... button. |
 |
| 13STEP: On the Landscape Library New dialogue box, select the Single Face radio button and check the View Aligned check box in the Default Geometry section. For Name: , type a name that makes sense to you. In this exercise I will use "man_horse". For Image File: , use the Find File... button and locate the "man_horse.jpg" file created in Step 10. If you are having trouble finding it, make sure you have set the Files of type drop-down list to *.jpg For Opacity Map File: , use the Find File... button and locate the 'man_horse_outline.jpg file created in Step 9. |
 |
| 14STEP: When you pick on the OK button on the Landscape Library New dialogue box, above, you should see a Landscape Library Modification dialogue box with an option to Save Changes... Pick the Save Changes... button and you should get the Open Landscape Library dialogue box shown in the illustration to the right. On the Open Landscape Library dialogue box you should find the "render.lli" file highlighted in the ../Support directory. Pick on the Open button and this will save the new Library object into the default AutoCAD Landscape Library Image file. |
 |
| 15STEP: On the Landscape New dialogue box place your new Landscape object: "man_hourse". Leave everything in default mode except the height, set the Height to 100.0. Use the Position < button to place it on the beach (see illustration, right). |
 |
| 16STEP: Restore the SW-CORNER view and Render the scene. You should now see a man on a horse with transparency all around him. This transparency provides the illusion of placement within the scene. And, having cool shadows through the horses legs does a bit to make this Landscape object seem real too.
|
|
In the final part of the rendering series, we'll look at Lighting - look for it in an upcoming issue of ARCHIdigm.