This is just like those stupid old digitizer tablets; the hunt-n-peck approach. I hated that. Even when I got really good at feeling out my digitizer buttons and prided myself in how fast I could move with them, I still felt it was clumsy.
With Architectural Desktop 3.0, I finally couldn't take it anymore because I find that I need so many different toolbars active at the same time. Since everything is in 3D, I need a lot of AutoCAD toolbars too; like the 3D views and the Shade buttons.
I am currently experimenting with two approaches to make my toolbar life easier and I will share them below.
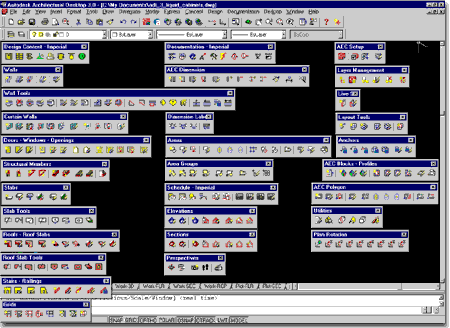

If you decide to create one single dockable toolbar, you should find that you can get most of ADT's toolbars on it. Illustrated to the right, I show how you might put all of the primary tools in an order that meets your needs and include some regular AutoCAD 2000 tools at the bottom.
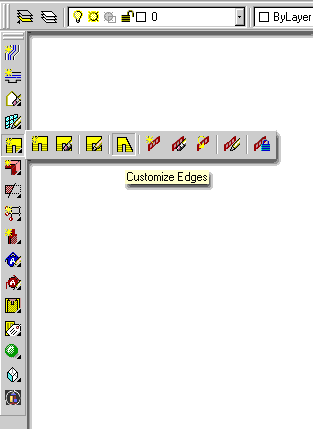
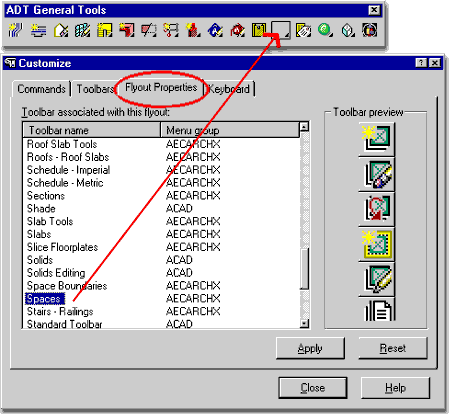
To activate or associate a User Defined Flyout, simply pick on it while in the Customize dialogue mode. You should get a warning dialogue that your blank flyout needs to be associated - hitting OK will take you to the Properties tab of the Customize dialogue box where you can find the toolbar you want to associate with.
If you get disconnected from your Custom Flyout, simply go back to the Customize dialogue box and pick on your blank flyout button; this will repeat the warning dialogue box with the OK button and take you to the Properties tab.
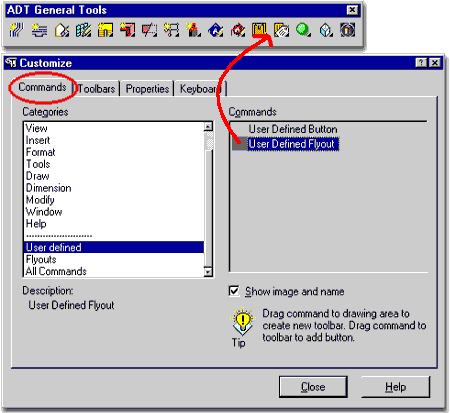
Only Flyout buttons will allow you to see the Toolbar name list and allow for toolbar associations, so if you don't see this list under the Properties or Flyout Properties tab, chances are that you did not pick on an actual User Defined Flyout button.
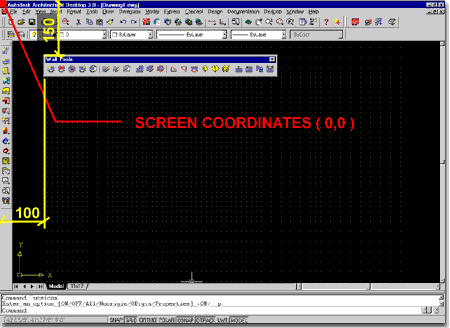
For the Walls and Wall Tools toolbars, I am experimenting with another option for making the toolbar access faster and easier to deal with. For these toolbars, I created a Custom toolbutton using ADT's button icons ( so I could easily recognize what this new button does ) and programmed it to load the appropriate ADT toolbar at a specific coordinate on my screen.
This way, I can move it around and do whatever I do when I work like a maniac but no matter what, I can always count on it coming back to a known position as long as I use my custom button.
Here's how it works:
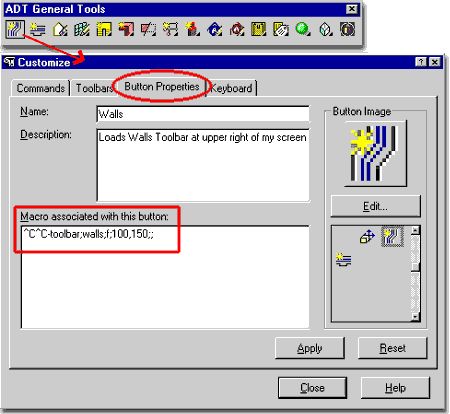
Simply create a blank button. Then, on the Button Properties for your new blank button, give it a Name, Description and an appropriate icon. In the illustration to the right, I show that I am using the WallAdd toolbutton image for my Add Walls Toolbar button.
For the Macro associated with this button, since you can't invoke a toolbar transparently, I added the ^C^C statements so Cancel, Cancel anything on the command line. Then, I used the dash ( - ) to activate the "TOOLBAR" command without a dialogue box, named the toolbar I wanted loaded and specified how I wanted it loaded.
Since I wanted my toolbar to load in the exact same location each time and not docked along any of the four sides of my screen, I chose the "f" for FLOAT option. This allows me to specify Screen Coordinates for my floating toolbar. After some trial and error experiments, I came up with some coordinates that worked well for me. These Screen Coordinates start in the upper left of your screen and go to the right and left in positive (X,Y) fashion.
The final statement I used was:
^C^C-toolbar;walls;f;100,150;;
If you want to experiment with other options for locating a toolbar, just type "-TOOLBAR" on the command line and look at your choices. Some people like docked toolbars and you can dock to "L" (left ) or "R" (right) for example, instead of my "F" (float).
If you have any problems, check the number of semi-colons against the actual number of times you need to hit the Enter key on your keyboard to make this work.
What are the names of ADT's toolbars?
If you open the AecArchX.mns file from your ADT support directory, you can read off all of the actual toolbar names. They usually start with "TB_" and are followed by what you will need to type in for the call to these toolbars; e.g., wall_tools, mass_groups, spaces, etc.
