If you have kids (I don't) or just happen to be a kid yourself (I am), sometimes you just have to use AutoCAD for something fun. In this article I discuss the primary steps involved in taking a physical object and turning it into a paper model using AutoCAD.
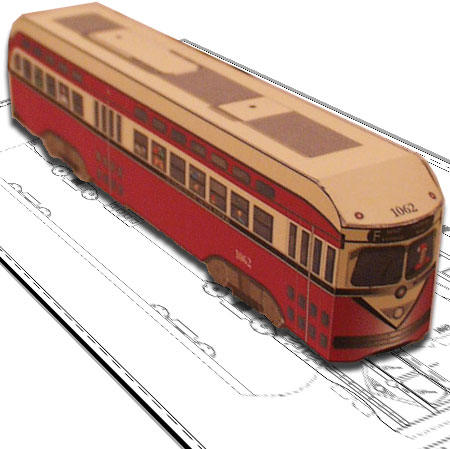
Illustrated to the right is a digital photo I took of the finished paper model. If this article is of interest to you, you can download the AutoCAD drawing file used to create this work. You can also download a .pdf of a colored version ready to print and assemble - see links at the end of this article.
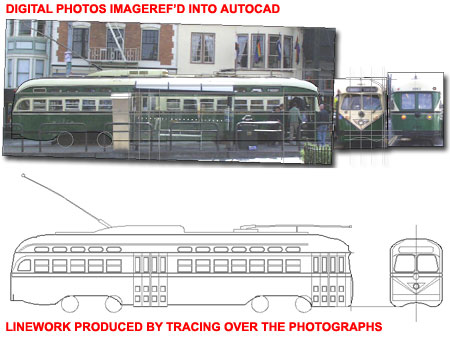
Illustrated to the right I show a couple of numerous digital photographs I took at a street car stop near where I live in San Francisco. Much to the distress of the various drivers, I jumped out in front of the cars and took straight-on elevations. I also ran around and tool close up shots for work I might want to capture in more detail.
Once back in my office, I use AutoCAD's ImageRef tool to bring some of the better images into a drawing environment where I did my best to scale the images as close to reality as I could.
Then, I used Plines, Arcs, Circles and so on to trace over the objects in the photos that I wanted to capture as linework. I used layers to separate things like the main body outline from doors and windows.
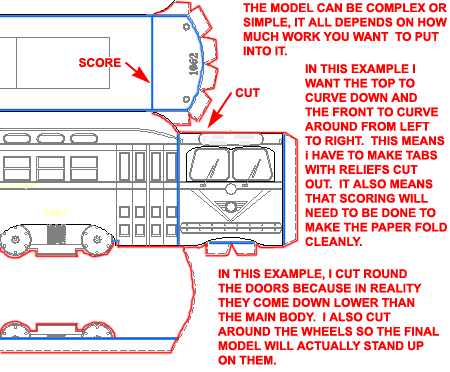
Illustrated to the right I show how I took my elevations and assembled them as an unfolded box. I added a roof and bottom drawing. Because there are limits to how much curvature you can expect to get when folding paper, I played around with various ideas and made a prototype to see if they would work. Once I decided on what was a reasonable solution, I figured out where my cuts, folds and scores should be located.
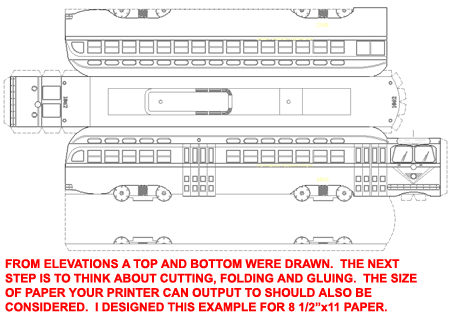
Illustrated to the right I show an enlarged view of the drawing above. For this example model I wanted the front to look more realistic than a box so I calculated how much curvature I wanted, listed the length of my Arc in AutoCAD and Stretched the front Elevation to match. I also decided that the Doors should stick out below the main body so I decided to just cut around them. Because the doors do not exist on the opposite side, the bottom will be held firmly in place by the glue tab on that side. I also wanted the wheel assembly to look more realistic and actually support the paper model so I cut these out as shown to the right.
Glue tabs along a curve have to be notched periodically to provide a relief area because they merge when folded.
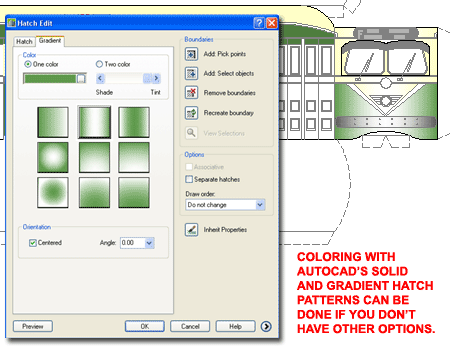
At first I thought I might color my model in AutoCAD. The new Gradient Hatch Pattern is pretty close to what PhotoShop offers but AutoCAD doesn't offer a drop-shadow and though I can simulate that effect with a Dot Hatch, it's not great.
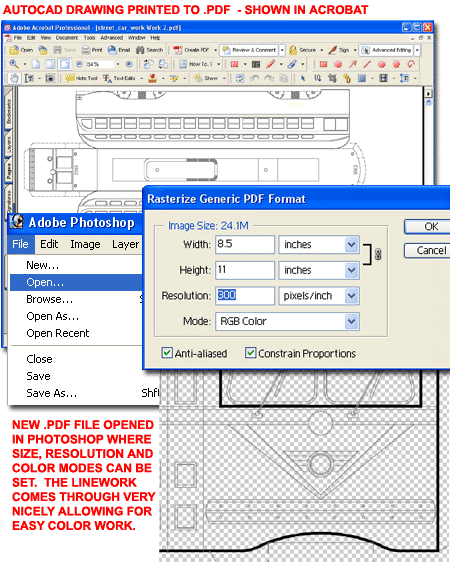
Every now and again I take a few minutes to look for new ways to export drawing from AutoCAD and import the work into PhotoShop. For this example, I found that printing to a .PDF document actually proved to be the ideal solution.
Illustrated to the right I show how the AutoCAD drawing appears in Acrobat and how it appears when Opened in Photoshop. Notice that when you Open a .pdf in Photoshop, you can set the Width, Height, Resolution and Color Mode. For my first experiment I used a Resolution of 600 pixels/inch and wound up with a 200Mb Photoshop file; after coloring and everything. I think 300 will suffice but run your own tests.
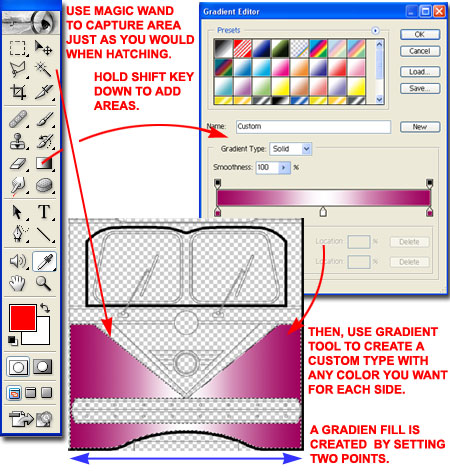
Illustrated to the right I show how easy it is to create dramatic effects in Photoshop based on the outlines created in AutoCAD. To color in an area, you may need to capture it with the Magic Wand Tool which will allow you to Add areas by holding down the Shift key or Remove areas by holding down the Alt key.
Once an area has been captured, it can be filled with the Paint Bucket Tool or with the Gradient Tool. When you activate the Gradient Tool, you can use preset gradients as a base for your own. In the illustration to the right I took a black metal gradient and changed the end colors to a burgundy color that matches one of the street cars I took photos of.
When you want to fill an area with a gradient, you need to specify where the gradient begins and where it ends. This is similar to drawing a line in AutoCAD by picking two points.
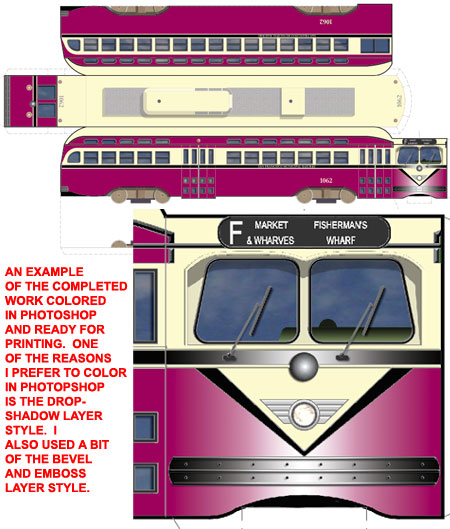
Illustrated to the right I show what my finished product wound up looking like after about an hour of coloring in Photoshop. The key is to use separate Layers for everything that you want to do unique things to. For example, I used a Bevel and Emboss Layer Style on many of the trim pieces to simulate how the metal actually covers a body joint.