On a project I completed recently I found that I did not trust the mechanical engineer's 2D layouts and decided to convert his work into 3D and match it up against my design that was already in 3D. Some of you already know the rest of this story but my point has nothing to do with the growing disparity between firms moving forward while others stay in flat land.
Illustrated to the right and discussed below is how I used Structural Members in ADT to convert 2D linework to 3D Ducts in a relatively short timeframe with relatively little effort.
When you prepare to create 3D Ductwork in ADT, the first thing you need to consider is whether you want your ducts as solid or hollow forms.
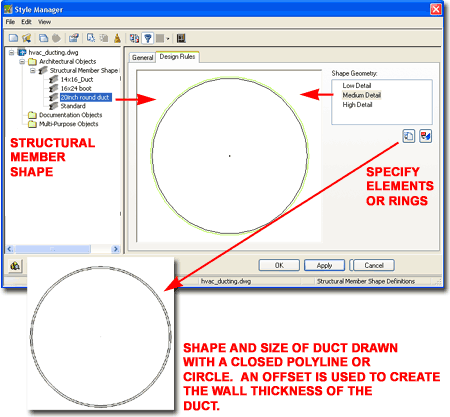
Illustrated to the right I show that I have drawn a 20 inch diameter circle with an offset to match the gauge of the duct wall specifications. Using the "MemberShape" (or "-membershapedefine") command, I show that I have created a new Structural Member Shape that I named "20 inch round duct". The shape is then set for each Display Representation buy using the "Specify..." button to Select the outer and inner circles. Be sure to use the OSNAP Center option to set the exact center-point or you could end up with some weird results later on.
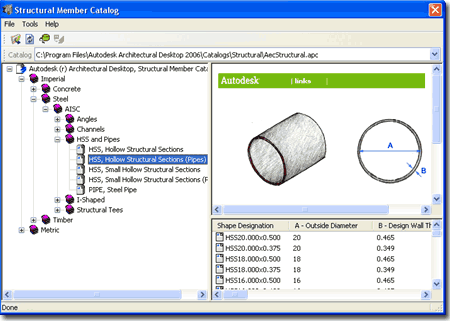
If the wall thickness for your ducts is basically irrelevant in your work, you may be able to find Pipes in the Structural Member Catalog. I have used these and they work rather well.
Another trick is to create a single 1 unit diameter form and use it for all of your Ducts. Different sizes are achieved by using the Scale option under the Design Rules tab of the Structural Member Style Properties dialog ( see below).
Once you have a Member Shape defined, you can use it in a Structural Member Style.
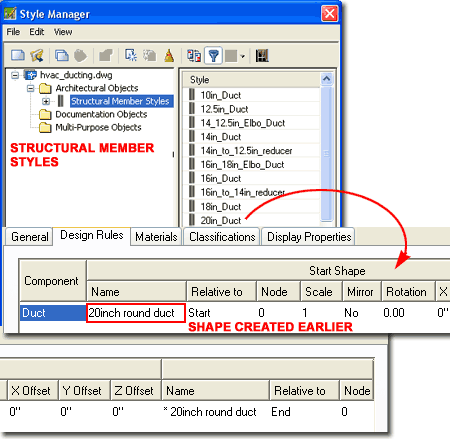
Illustrated to the right I show that I created a new custom "MemberStyle" that I named to match the intended use: "20in_Duct". On the Design Rules tab of this custom Structural Member, I show that I have simply Selected my custom Shape under the Name field. For a simple linear duct this is all you have to do but for more complicated ducts, like those that change from one end to the other, see my comments at the bottom of this article.
Once you have a custom Structural Member Style that uses your custom Member Shapes, you are ready to test it.
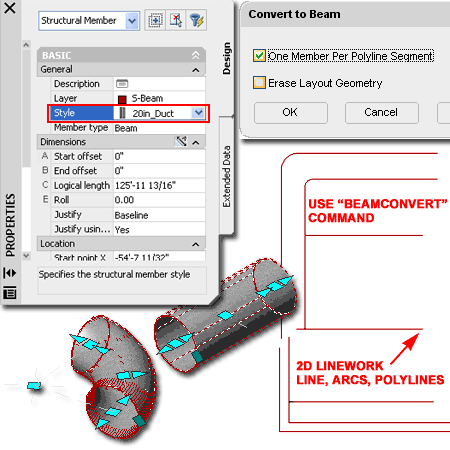
Illustrated to the right I show an example of how some 2D linework might look when you receive it from a mechanical engineer. In many cases you may need to trace over the linework with Polylines and Arcs to create better results.
Though you can use "ColumnConvert" or "BeamConvert", to create ducts out of 2D linework, I prefer to use the "BeamConvert" command because of how it displays in Plan View.
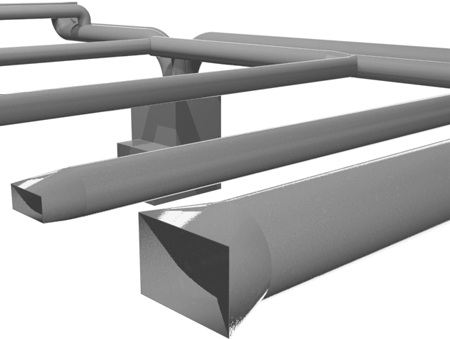
Also illustrated to the right I show a couple of examples of the results that you should get once you set the default Member Style to your custom Style on the Properties Palette. I find it best to keep each segment as a separate Object because it allows me to come back later and make unique adjustments; including changing sizes, direction or Style type.
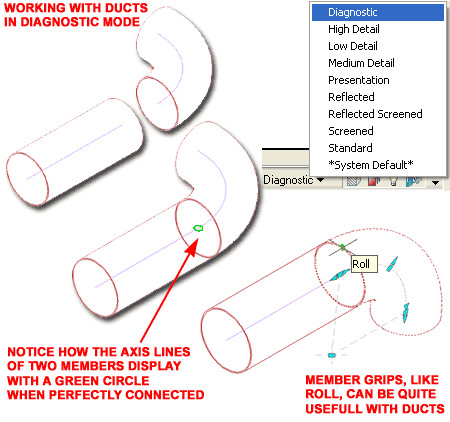
One of the best features you will find in ADT, when using Structural Members as ducts, is the Diagnostic Display Configuration. When you start to create complicated ducts that run in all sorts of directions it can become difficult to confirm that your ends connect properly. Under the Diagnostic Display Configuration you will find that as soon as you OSNAP two Axis ends together, a Green (Color 70, by default) "Connection" Circle appears. Not only does this insure that you have connected your ducts properly but they are now locked together as well.
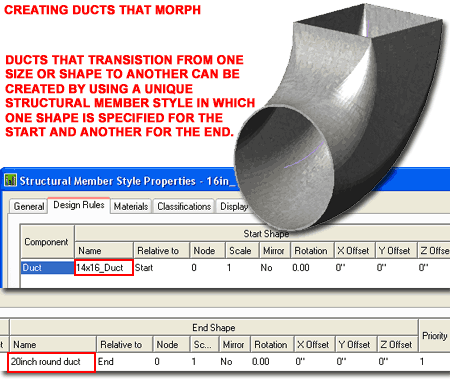
Illustrated to the right is an example of an elbow duct that morphs from round to square. The secret to creating this type of Shape is to create a custom Structural Member Style that uses one Shape for the Start and another for the End - that's all there is to it.
