On a recent project I was faced with a rather simple requirement that turned out to be more frustrating than expected. I don't know why I was surprised given that my problem centered around working with those enigmatic Structural Members in ADT.
Once you get past the Vector Normals that don't conform to the WCS, Structural Members tend to be fairly simple Objects to work with. For those who are unaware, you can even stack up Member Types to create things like round Concrete Columns over Steel Columns. You can also control the shape of a Member by setting intervals and defining the Profile at those intervals but I dare you to create a decorative Corinthian column that way.
In this article I will discuss some of the tricks I employed to combine decorative columns with Structural Members.
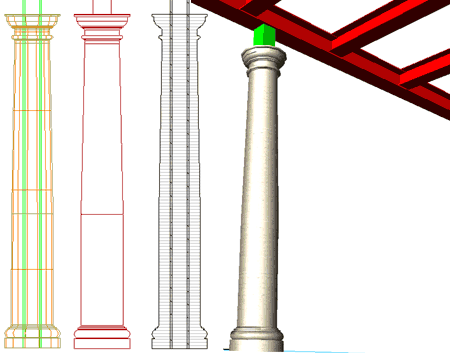
The first phase of creating a custom decorative column involves creating a 3d Model. Illustrated to the right I show a rather simple way to create a Doric-like column by using the Revolve command on a closed Polyline profile shape. You can then use the "MassElementConvert" command to convert the Solid Model into a Mass Element. The advantage of working with a Mass Element is that you can use Material Definitions and Display Properties to control how the decorative Column will look from different directions and under different Display Configurations. However, if basic linework is all that you need, converting the Solid Model into a Mass Element is not essential.
For more complex forms such as Ionic or Corinthian Columns, you may need to hunt for surface models on the internet or create them in other programs such as Viz, Rhino or Form Z.
Note:
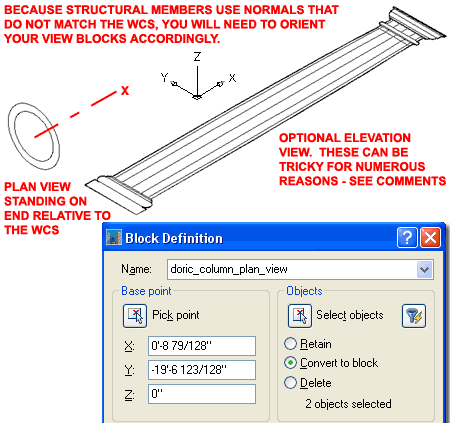
Notice that in the illustration to the right I have drawn my example column
horizontally relative to the World UCS ( along the X-axis ). Because
Structural Members have their own Normals that don't conform to the WCS,
you often have to plan ahead for unexpected results.
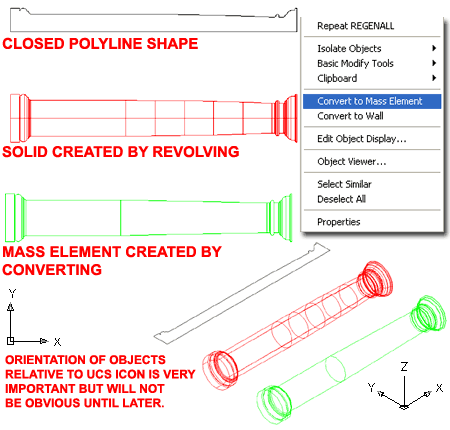
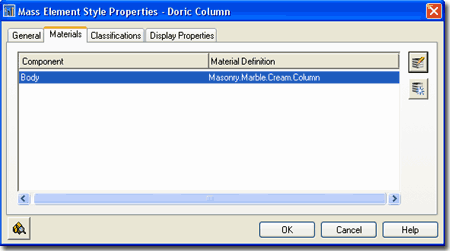
In the previous step I discussed converting a Solid Model into a Mass Element ( or Facet Model ) and in the illustration to the right I show one of the advantages Mass Elements may offer you.
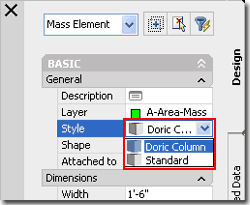 After
creating a Mass Element, make sure to create a New Mass
Element Style so you can assign
unique properties to this style that don't affect all other Mass Elements
that might belong to the default "Standard" Style.
One of the fun things about creating custom solutions is all of the other stuff you figure out along the way. When you make a Block of a Mass Element, for example, it won't display properly if inserted and then rotated perpendicular to the plane of origin. In the case of this Column example, that is probably not such a big deal because you are likely to want a rather simple Plan View rather than a true Plan View of the Model.
To create a Plan View of the decorative column, simply draw the linework that you want to display in Plan.
You can also draw linework for how you want your decorative column to display in Elevation View but I find that the display options for Mass Elements are quite good and should prove to produce as much or as little detail as you would prefer for the Elevation View of your decorative column.
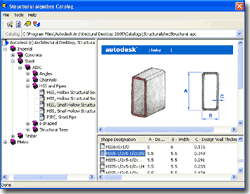
If your structural engineer has provided you
with the structural column specifications, you should be able to find it in
the Structural Member Catalog, illustrated left, and load it.
If you don't
 have
the specifications yet, you can use the closest guess and modify it later on
the Design Rules tab.
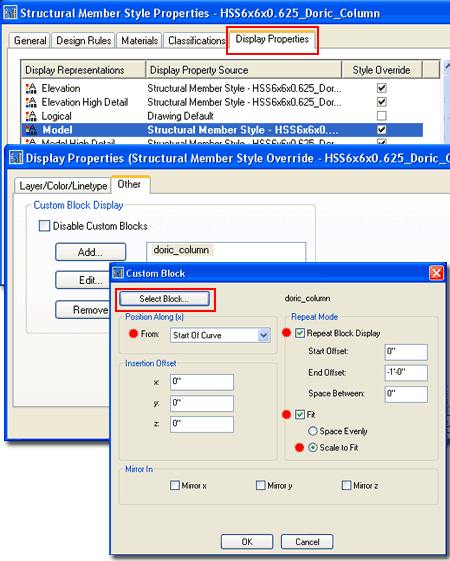
Once you have a Structural Member Style loaded into your drawing, use the Style Properties dialog, as illustrated to the right, to make the remaining changes. Since this Style is sure to be unique, you may want to add the name of the decorative column type to the end of the structural member size.
On the Display Properties tab of the Structural Member Style Properties dialog, use Style Overrides to assign the Blocks we created earlier to the various Display Representations that you want to change. For the Model Display Representation, for example, you will want to assign the 3D Model of the decorative column as illustrated to the right. Even if you did not create a 2D Elevation View of your decorative column, you will still need to assign the same 3D Model to the Elevation Display Representation ( it's not automatically done even though you have assigned it as part of the Model View ). Don't forget to repeat these steps for the Plan View by assigning the 2D Plan View Block of your decorative column.
Illustrated to the right I have placed some red dots on the Custom Block dialog in order to call your attention to important options that can make or break the success of all this work. Assuming you used the the bottom center as the insertion point of your decorative column block, the Position Along (X) should be set to "Start of Curve". Notice that the X-axis of the member is what we would typically think of as the Z-axis and that's why we created the decorative column along the X-axis instead of the Z-axis. To get the best results, I found that you can use the Repeat Mode options to force the decorative column block to be more flexible than a static block. Notice also that I show how you can use the End Offset value to recess a decorative column down to a finished ceiling or decorative beam height rather than the true structural column height. The Fit option with "Scaled to Fit" will stretch or shrink your decorative column Block up to a point. Since this feature is part of the "Repeat Mode", once you provide a physical length to your structural column that is two times the original decorative column Block's length, you will see a repeat or copy occur.
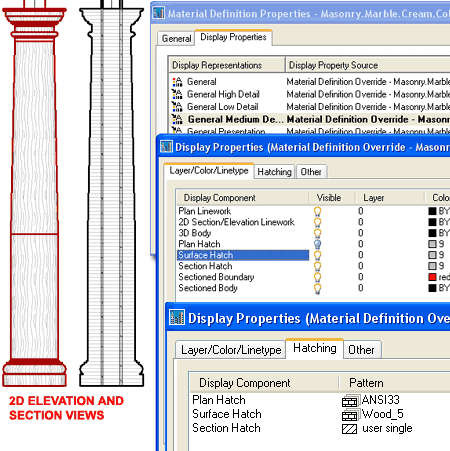
If you converted your 3D decorative Column into a Mass Element and provided it with a unique Material Definition, you should find that for 3D Renderings, 2D Elevations and 2D Sections the work pays off in exceptional fashion. Illustrated to the right I show how working with the Hatch Display Components of the Material Definition for my example decorative column has allowed me to put a wavy wood texture on the 2D elevation view and a horizontal hatch pattern on the 2D Section view.
Tip:
Remember that 2D Elevation and Section Objects have Styles too and their
Display Properties
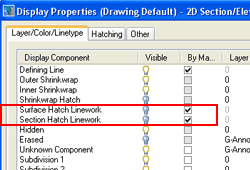 can
override any settings you may have set on the individual Material
Definitions. For example, you may set a Surface and Section Hatch
Pattern here but if those Display Components are not Visible under the
current 2D Elevation or Section Style's Display Properties, you won't see
them.
