Rendering images for clients is a great way to communicate concepts but they can consume a lot of time and, if not nearly perfect, can distract a client with questions about design issues that are not particularly important at the time of the meeting.
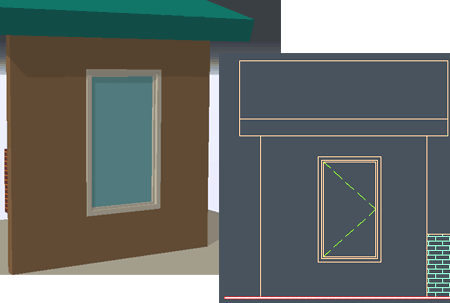
To avoid problems with Renderings I often provide simple sketchy views such as the one illustrated to the right. For the most part I am satisfied with what I can produce in AutoCAD and AutoCAD Architecture with respect to sketchy images (thought SketchUP is so much better that it boggles the mind). However, representing glass has always plagued me so I finally took the time to work on a solution that I will share in this article.
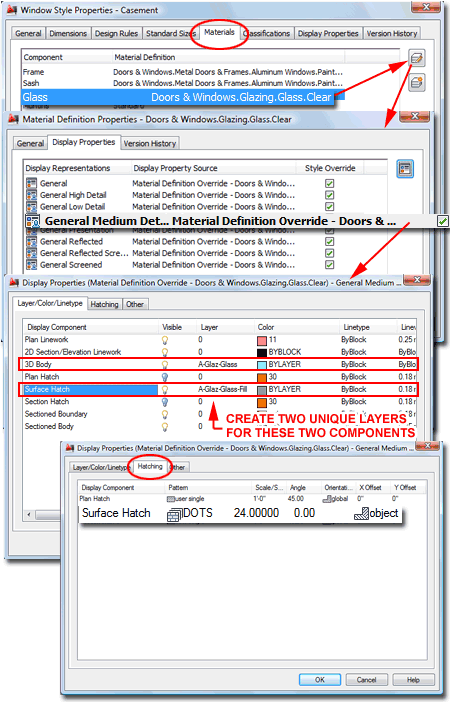
In the illustrations to the right I show the steps you can take to alter the default glass material in AutoCAD Architecture (notice that the Material Definition name is still screwed up: inconsistent use of spaces, the "&" symbol and periods but I digress).
When you modify the Glass Material Definition Style, use the General Medium Detail Display Representation for your first run at this because this is the most commonly used Display Representation.
For the General Medium Detail Display Representation, I show that I have set the "3D Body" and the Surface Hatch to unique Layer Names that I created earlier. I need these two unique Layer Names for Layer control later on. On the Hatching tab, I have used the "DOTS" Hatch Pattern with a Scale of 24 but you can, of course, use whatever Hatch Pattern and Scale you prefer.
When you have completed these settings, you should find that all Object Styles that use the same Glass Material Definition Style will now display the Surface Hatch Pattern.
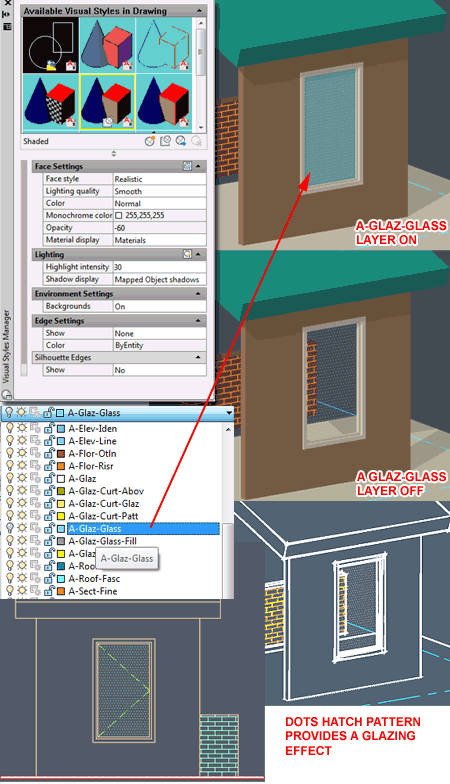
In the illustrations to the right I show the Visual Styles Manager Palette to indicate how you can experiment with "Shaded Modes" to employ the trick outlined above. The trick won't work if you use a Visual Style that is meant to show full render materials.
Because I set the Glass 3D Body to a unique Layer Name, I can turn that Layer Off and consequentially the 3D Body. This allows me to display a Shade Mode where the glass appears transparent yet defined by the "DOTS" Hatch Pattern (hard to see in my reduced images).
Another interesting aspect of using the "DOTS" Hatch Pattern as a Surface Hatch Pattern is that it will appear in 2D Projected Sections and Elevations. If you don't like this effect, you can simply use the Layer Name for this Display Component to turn it Off (Refresh the 2D Elevation).
Unfortunately you cannot turn off the 3D Body and still have the Hatch Pattern display in 2D Projected Elevations. This would be a great way to show things behind glass. In my Bathroom Cabinets eKit, I found a way to create this effect for shower glass by creating a Block of a Hatch Pattern and Adding it to the Glass Object as a unique Component.