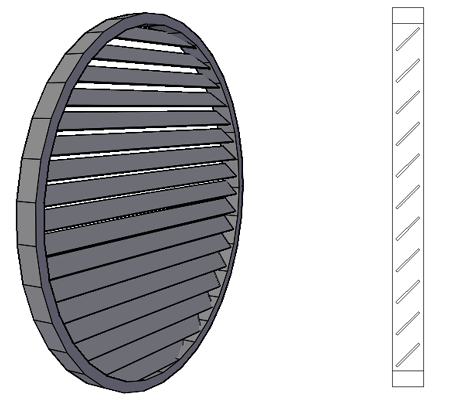
If you take a look
through AutoCAD Architecture's Window Library the closest thing you are
 going
to find to a louvered window is the Jalousie Style. It's not a bad
solution for one specific type of window with one specific shape but once
you try to use it for other solutions, you are likely to run into problems.
In the illustration to the left I show what happens when you attempt to use
the Jalousie Style as a louvered vent window in a Polygon Peak Shape.
The problem is that his window style was designed to use a Block and an
insert. In this article I will cover the basic steps needed to create
completely custom louvered windows.
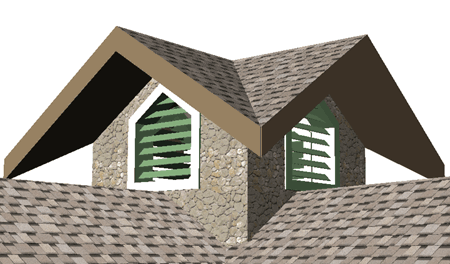
In the illustration to the right I show how I used a Door/Window Assembly Style to create a mechanical ventilation opening in a cupola for a winery. The Number of Louvers, their Width, Depth and Angle are all completely adjustable.
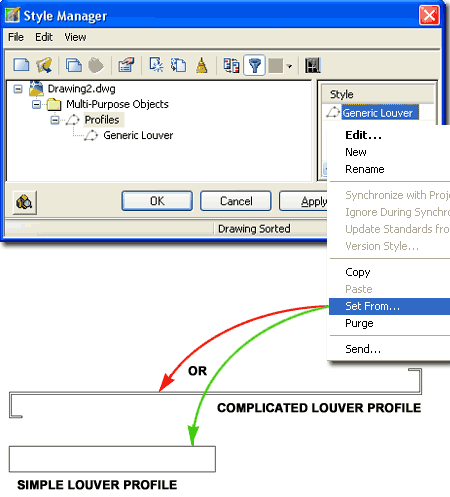
Before you get started with the design of your "DoorWinAssemblyStyle", you will need to create a custom "Profile" of your louver.
In the illustration to the right I show a slightly complicated louver and a simple rectangle. Both are created from Closed Polyline Shapes. The simple shape, the rectangle, will actually offer greater flexibility later on so that may be your best choice depending on what you are looking to achieve down the road.
When you use the Profile command and create a New Profile Style name, use the "Centroid" option for the "Insertion Point or <Centroid>" query.
For a more complicated louver profile, you will most likely want to draw it in true dimensions but for the simple rectangular profile, you can draw it one unit by one unit.
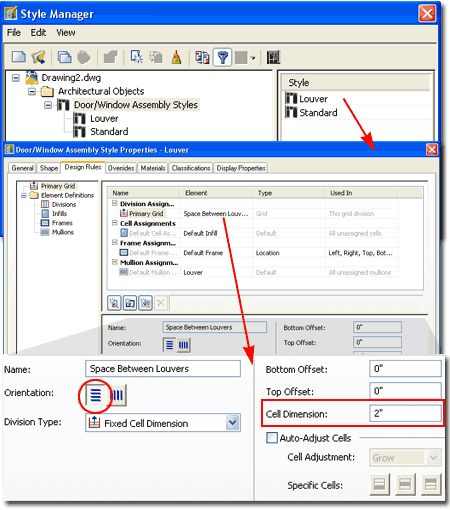
Use the "DoorWinAssemblyStyle" command to create a new custom style as illustrated to the right. For the Primary Grid, set the Orientation to Horizontal, the Division Type to "Fixed Cell Dimension" and the Cell Dimension to something appropriate for the spacing between your louvers (I used 2 inches).
Note: I changed the Name from "Default Division" to "Space Between Louvers" just to remind me that the divisions are about the louvers.
Under the Infills Definition, set the Panel Thickness to 0 to remove the panel.
Under Frames Definition, set the Width and Depth as needed and remember that DWA's don't have an option to automatically adjust to Wall Widths (what a shame). For extra credit, create a custom Profile for your frames so you have trim on the outside and inside of your louvered opening.
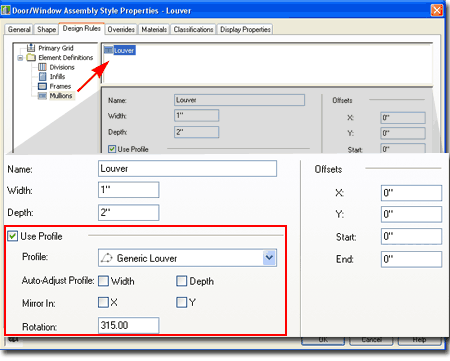
Under the Mullions Definition, set an appropriate Width and Depth for your louver design. Check the "Use Profile" box and select the Profile name created earlier. Then, set the Rotation for your louvers.
Note: For this example, using a more complicated profile, I show that I did not use the "Auto-Adjust Profile" options which will keep the louver true to its original dimensions as set by the Profile Style. See comments at bottom of this article for more information on this subject.
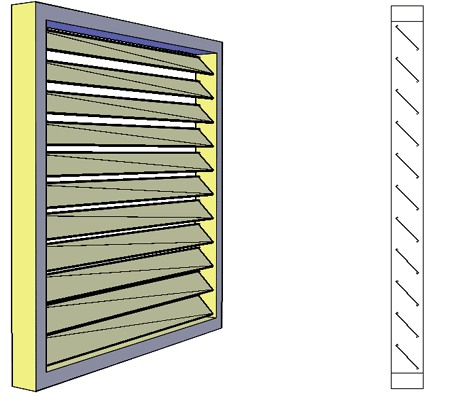
For me, louvers just need to look believable in Renderings and Elevations but you may also want to consider Sections and/or Details so be sure to look at your results in a Front and Side View.
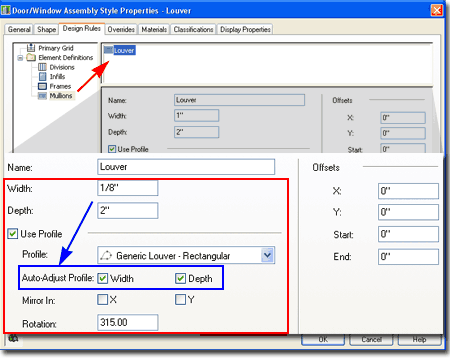
In the illustration to the right I show how you can use the Width, Depth and Auto-Adjust Profile options to make louvers for just about any scenario. By using a simple rectangle as the louver profile, I can control its Width and Depth using the Auto-Adjust Profile checkboxes. If you try to apply this trick with a more complicated louver profile, you may find that its proportions adjust erroneously but it can be done provided you use a Width and Depth value that is geometrically proportional to the original profile dimensions.
In the illustration to the right I show how the simple rectangular Profile works as a louver.
