Our clients have found this form of communication during the design process so valuable they pay extra to get more done. And why not, look at what 1 hour of rapid VIZualization can do for a concept.
Below, I outline the basic steps required to create these simple Browser Viewable spherical renderings.

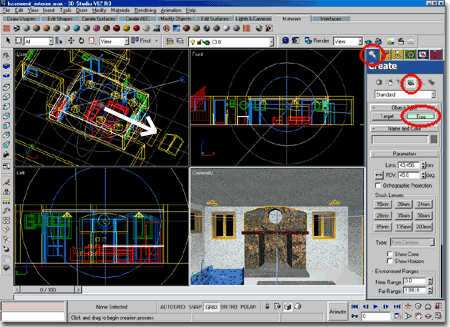
In this illustration, right, I show the process of placing a camera in the scene.
From the Create menu, select the Camera icon and place a Free Camera in your scene. A Target Camera will also work but I have found the Free one easier for Panoramic View making. The trick is to have a level camera facing where you want your opening panoramic view to begin. If you use a Target camera, you can easily create a panoramic view that tilts off axis as the viewer pans around the scene.
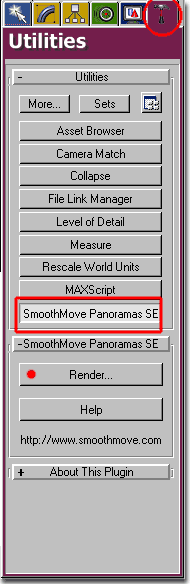
When you have selected the SmoothMove Panoramas SE button, you should see another button for Render... as illustrated to the right.
see comments below...
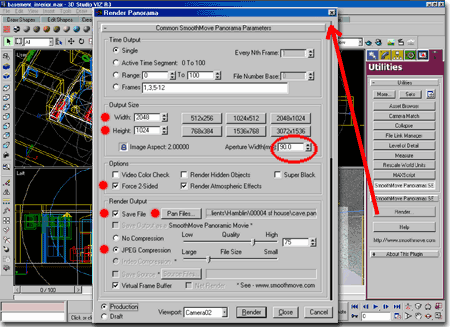
The following information is what you should keep in mind when making a Panaview:
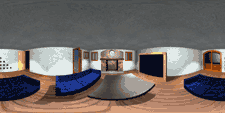
Since Panaviews are really a flat image representing a sphere, the Output Size needs to be large.
The Aperture Width (mm) is something you can play with, I found that basically any value produces a similar result because it's all round in the end but I have had good results with 90mm. Recently I did some Panaviews with 35mm and they looked identical to the 90mm, so try any value you want and see how it looks.
Force 2-Sided had been marked with a red dot, right, just because it's often necessary to use this option when working with imported ADT geometry.
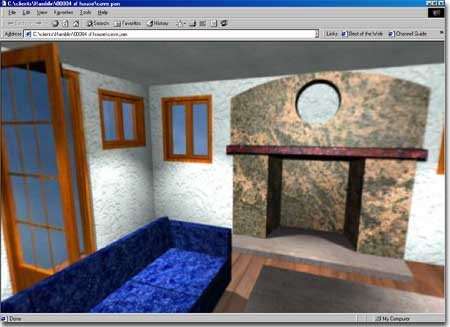
The file, when saved, will become a .pan file that requires a browser plug-in from www.smoothmove.com/viewers/
If you plan on sending one of these by e-mail or hosting it for client viewing, you will need to use some form of JPEG Compression because these files can get big. Trial and error is the only way to figure out what level of compression quality you can get away with.