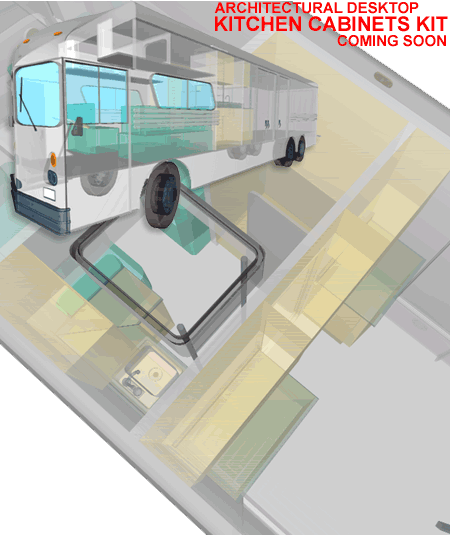
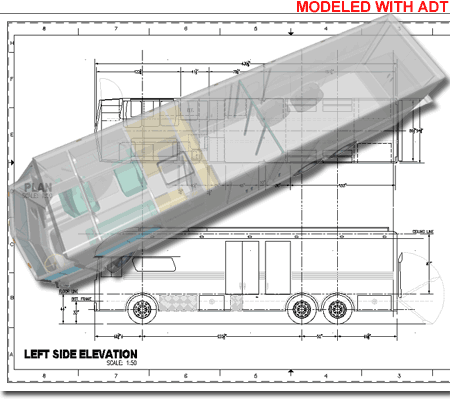
Yea, it is a bus but it was done with Architectural Desktop 3.3 and though that might not make a lot of sense it was fun to push the product and our skills. The job, still in Design Development Phase, could have been produced with many other software programs such as Rhino, Viz or Form-Z but because we specialize in using ADT for our architectural work, we felt we should see what we could do with it.
This vintage 1960's bus will be used as the ultimate SUV; in fact, it will be hauling an SUV in the rear (not towing, but hauling). A more difficult portion of the design job involves resolving the basic necessities required for long trips around the United States: like a bathroom, kitchen, beds, energy and waste provisions and so forth.
In the commentary below, I elaborate on a few of the ADT tools that were used on this project thus far just in case you may want to do similar work.
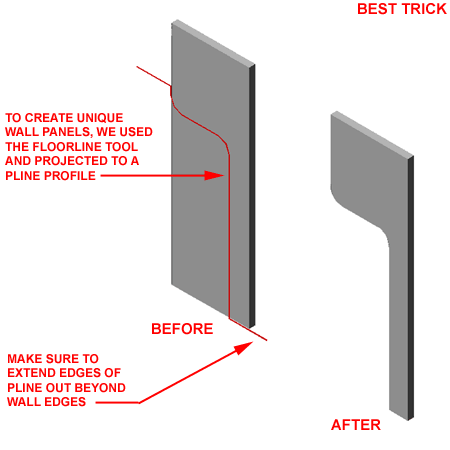
Of the many tools that helped to resolve the problems of working with a bus as opposed to a house or commercial building, the FloorLine ( and Roofline ) tool ranks really high on our list of successes. To create an irregular curved wall in elevation, such as that illustrated to the right, you can draw the shape in Pline form and then apply the FloorLine tool to make an existing Wall object conform to the Pline shape.
As illustrated to the right, for greater success with this tool, make sure that you extend the edges of the Pline shape out beyond the length of the Wall object before using the FloorLine command. You can create the reverse result by using the RoofLine command.
For more information on the use of this tool and every other ADT tool, subscribe to one of our Architectural Desktop eGuides.
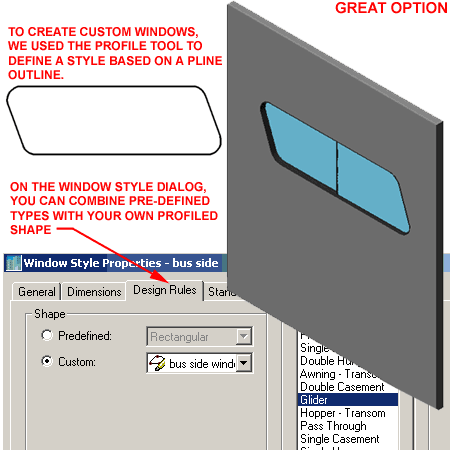
Vehicular design is not quite as rigidly square at most architectural elements and thus we found the Profile option for shaping Windows and Doors absolutely essential in order to use these objects.
Illustrated to the right I show the Pline shape used to create two of the existing side windows in this bus. After creating a Pline shape, use the Profile command to create a Profile Definition that can then, in turn, be used as a Custom Shape under the Design Rules tab of Window or Door Styles ( as illustrated to the right ). The trick for best success with this solution is to make sure that you draw the Pline shape exactly equal to the size you want and then use the exact same Width and Height when Adding the Custom Window or Door to a Wall object. Because ADT does not maintain aspect ratio control on custom shapes, it is very easy to make a mistake and get poor results.
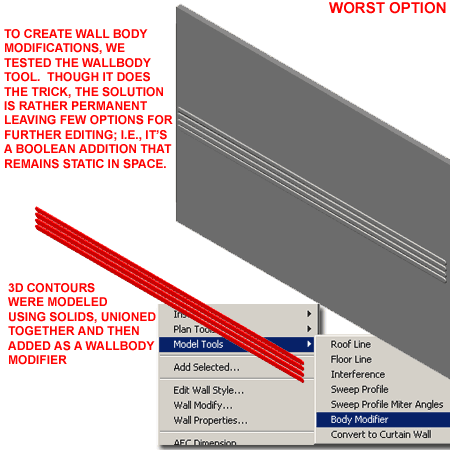
In many cases ADT offers solutions that, at first, appear fantastic but then come back to bite you when you need to make other changes to a design. Illustrated to the right is an example of how the WallBody tool can be used to easily merge shapes created with other tools. To capture some of the cool body molding details, we modeling many things with Solids and then used the WallBody tool to merge them into the exterior Wall Component ( using the appropriate Index number ). Though other tools will produce similar results, this one was enticing because once the merger has been accomplished, you don't need to keep the original objects to maintain the transformation; i.e., once done, it is permanent.
The unfortunate aspect of using this tool is that it is rather permanent and thus reduces the options on further editing by significant degree. In simplistic terms, this tool basically Unions the external object into the Wall object as a full shape that cannot be modified. This means that if you want to stretch the Wall, the merged or unioned shape not only remains in its original length but also in its original position. The consequences can be as weird as having a short wall with the merged elements hanging freely out in space nowhere near the wall.
The good news is that that you can reproduce the original merged shape should you need to Remove it from the Wall, edit it and then re-merge it (WallBodyRestore). You can also Remove the merged object by using the Wall Properties dialog and visiting the 3d Modifiers tab.
Not only do we cover all of the tools required to model this project in our eGuides, we will soon be releasing two Kits for ADT 3 - 4 that will make the job even easier. All of the cabinetry in this bus, for example, was created using our Kitchen Cabinets Kit ( including sinks that subtract holes in countertops ). The Rendering work was also accomplished using the included Rendering Template Files that automatically assign materials to most ADT objects.
Subscribing now automatically provides you with access to both ADT 3 - 3.3 information and new ADT 4 information as it gets published. Subscribers get free access to our i-drop content, the PowerSTRIP menu for ADT and free access to all pay-per-view articles.